------------
final video
Evaluation
How it went:
Not as well as I hoped. We started off well enough with me leading. I set two people to each scene. Two were assigned the outside and the other two were dealt the inside of the windmill. I would later take 1/3 of the shots inside the windmill because the inside team said it was too much work and couldn’t handle it.
Research:
The research and development was based around a simple story and plot we made up prior to the handout of the project. This was during the summer holidays where Arran, Russel and myself started early to make a good start.
Modeling
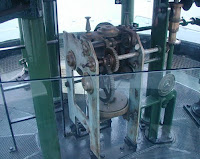
My side of modeling was simple. Early on when Joe seemed more competent in the project, he had managed to start the basic windmill shape so others can work off it. I had to take that windmill shape and construct objects, such as the gears and cogs, inside so it would match the rest of the video later on in the film.
I also made crates, wooden pillars, hanging light bulbs and canisters from the early concept work. I would have liked to add more but I was running out of time and needed to start the UV texturing I learnt earlier in Alex’s project.
But knowing what I know now in Maya, I would have done things a lot different. The gears would definitely have been replaced and I would have added different textures to parts of the wall and floors. I would have tried to do draped fabrics like Arran as well as rope and other miscellaneous objects I thought of in the concept.
Texturing
A big problem was that not everyone knew what the textures looked like. I was the only one with a clear idea of what was needed so that didn’t help.
Russell managed to get the right idea.
Lighting
Dave showed me how to make lights in Maya and different ways they can affect a scene. I found lighting and shadows easier than expected.
A few ambient lights with colour and point lights for casting shadows can change a shot dramatically.
Most lights were behind the cameras, giving the basic light and tone to the model. Other lights were used in the swinging light bulb and window to create a sense of atmosphere and realism.
Rendering
The render dident take long with my scenes. It only took half an hour to bach render and I managed to import the images to after effects and exsport it as footage with ease.
But with Arran’s scene we each had to take a camera and render by ourselves. I don’t see why the rest of my team didn’t use the render farm at college for the lager scenes, I think the rest of the team had miss trust about it even thought it would have saved a lot of time and even managed to finish shot that were not finished by the end.
Next time I think it would be best to encourage my team more to utilize the college facilities at hand.
I took camra two and started render 18 hours befor I had to go to college. It only got three seconds done. I had to exsend the footage by four in order to fit in the final video. All in all only about 4 seem to be to the right speed with 24 fames a second.


